

How To Turn An Image Into A Charcoal Drawing In Photoshop
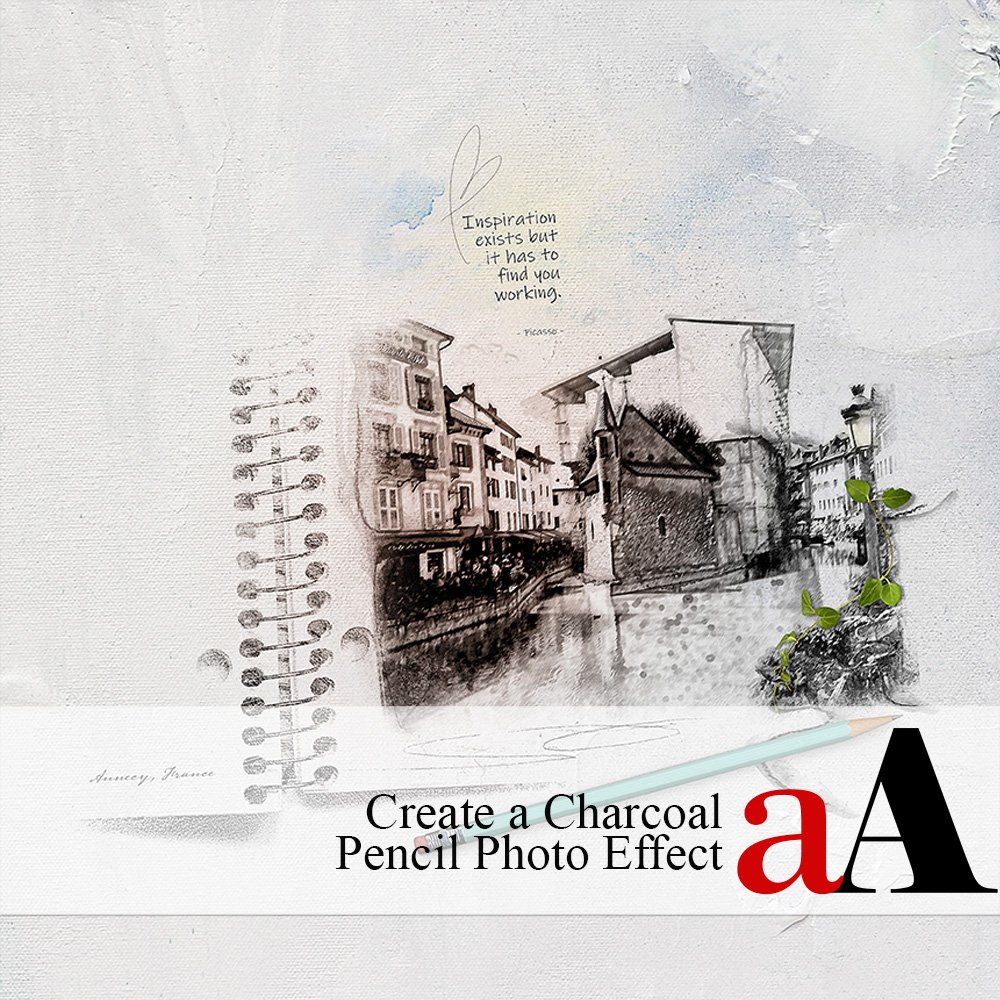
Today, Margo is sharing how to Create a Charcoal Pencil Photo Effect.
This tutorial is for Adobe Photoshop Users only.
Create a Charcoal Pencil Photo Consequence
Introduction
Transform your photos into pencil drawings using filters in Photoshop.
- Elevate your photos.
- Add visual interest to your artistry and scrapbooking layouts
1. Select Photo
Open the paradigm into Photoshop and indistinguishable.
- Go to File> Open, select photos and click OK.
- Double click the 'Background' layer in the Layers Panel to unlock.
- Duplicate the prototype layer by dragging the photograph layer to the New Layer icon in the Layers Panel.
- You lot can also apply the CTRL/CMD + J keyboard shortcut.
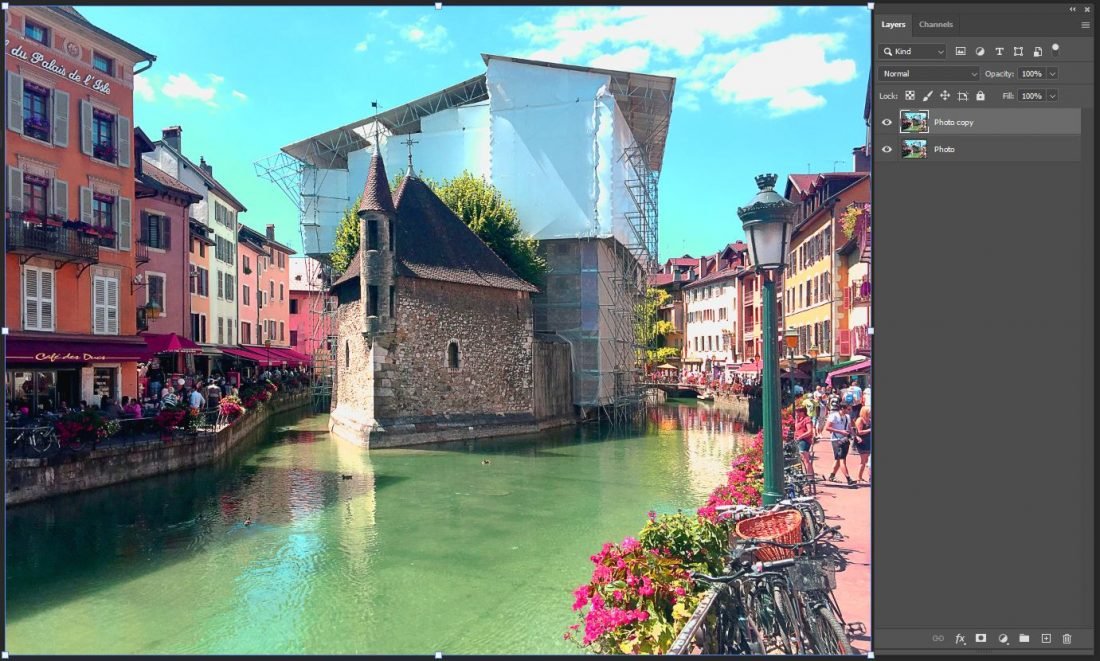
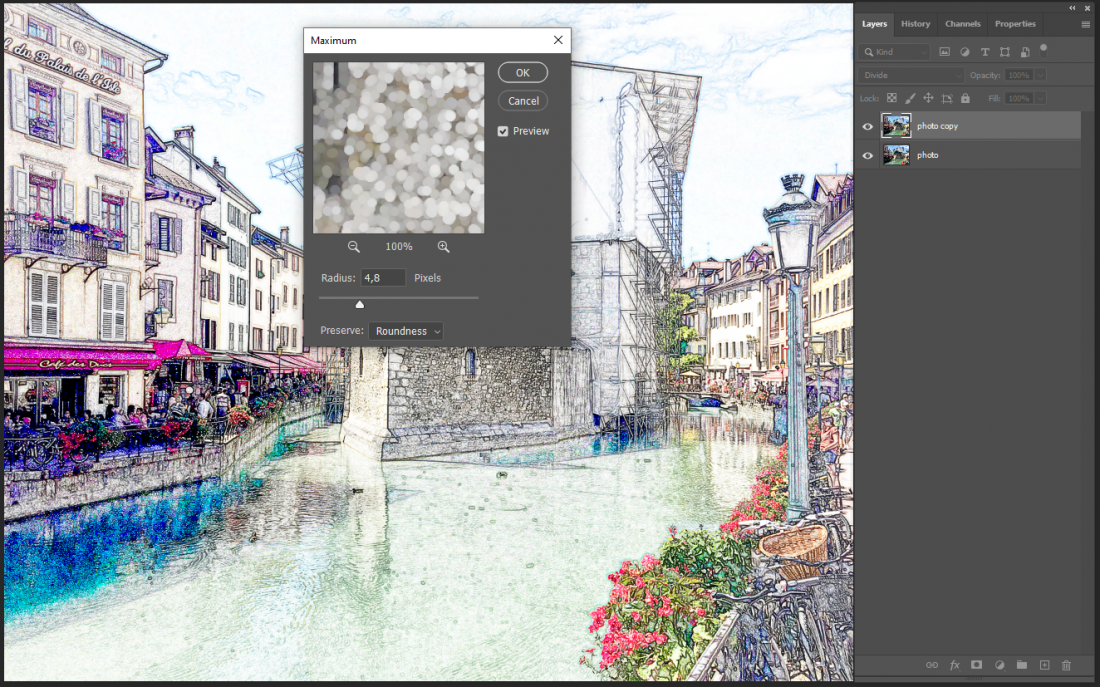
two. Photo Copy Layer
Apply a Divide Blending Mode and Maximum Filter to the Photo Re-create Layer.
- Select the duplicate or 'photo copy' layer in the Layers Panel.
- Apply the Divide Blending Mode from the top of the Layers Panel.
- Click on 'Normal' and select Divide from the drop-downwardly menu.
- Go to Filter> Other> Maximum.
- Fix the values according to the paradigm below to determine the thickness of the pencil lines.
Note. Experiment with the values to find the all-time fit for your photos.
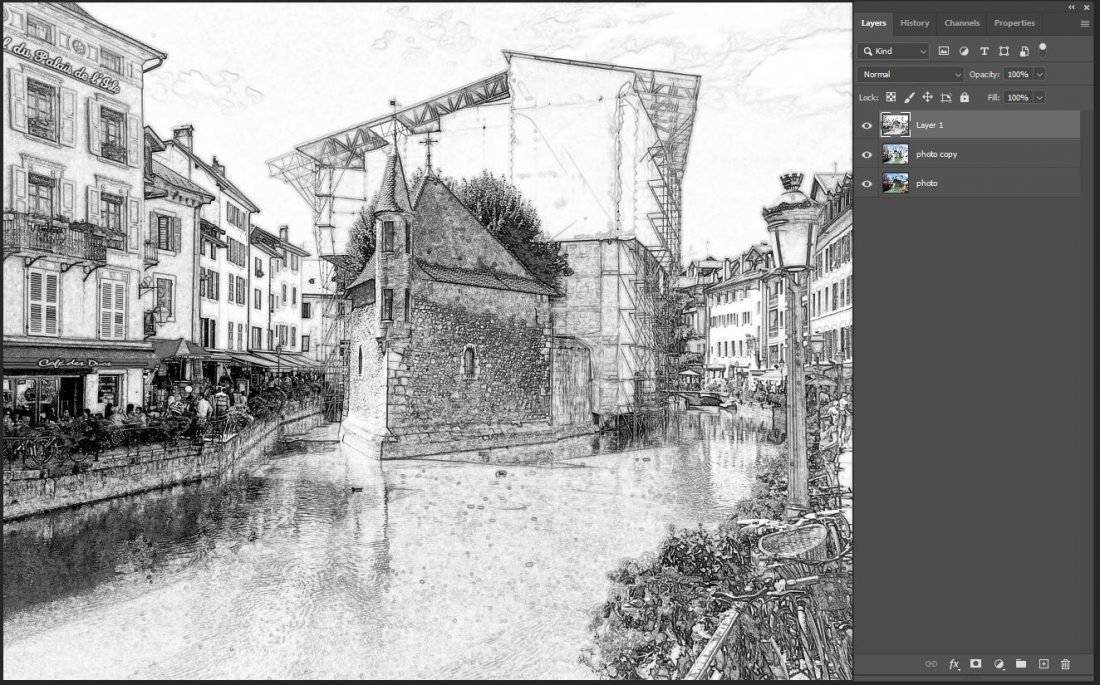
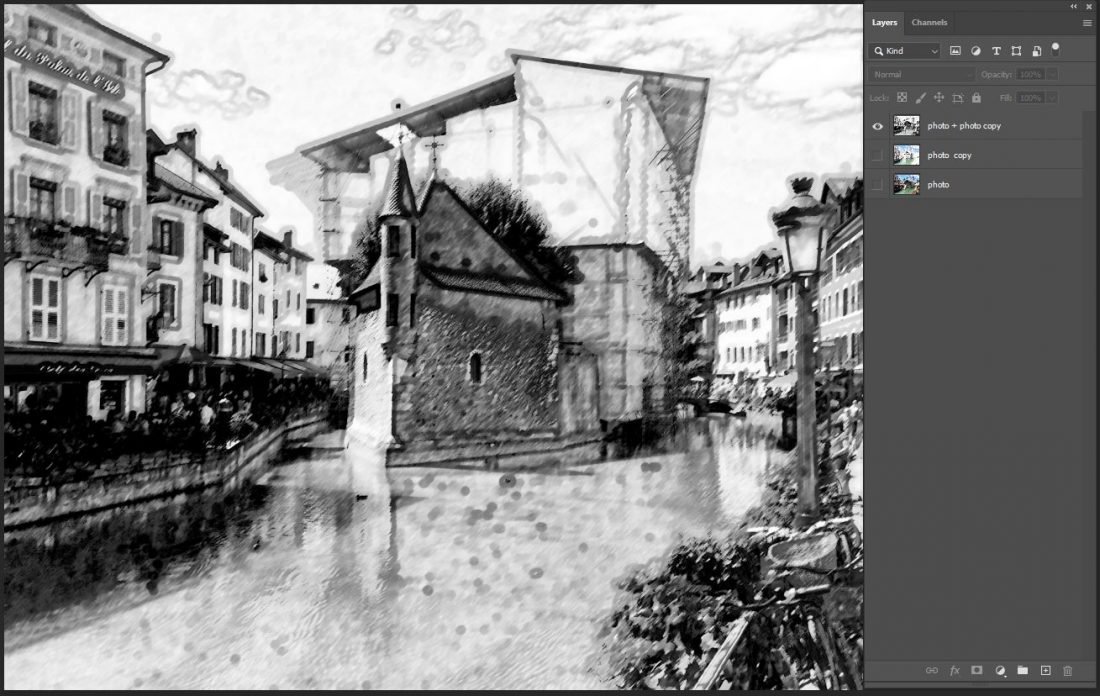
3. Create a Blended Layer
Create a composite layer which merges the two photo layers higher up the original photo layer.
- Select the layers in the Layers Panel.
- Press CTRL/CMD + ALT/OPT + SHIFT + Eastward.
- Notice the single merged layer appear above the original photo layer.
- Blur the image slightly via Filter> Mistiness> Gaussian Blur and adjust the Radius value equally preferred.
- Get to Epitome> Adjustments> Desaturate (or press SHIFT + CTRL/CMD + U) to create a blackness and white image.
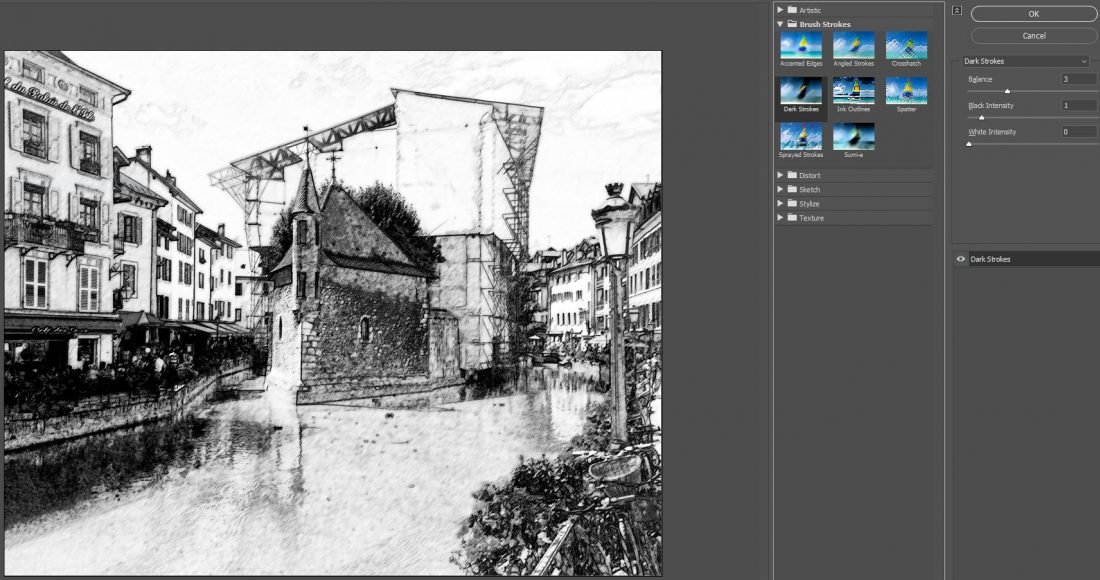
4. Utilise Creative Filter
Drag the image further using Night Strokes Creative Filter.
- Go to Filter> Filter Gallery> Castor Strokes> Dark Strokes.
- Gear up the values using the image below or to your preference.
Note. Values will be dependent on your unique image.
5. Save Pencil Outcome Image.
Relieve the image as a .jpg image.
- Go to File> Save As.
- Select the .jpf file extension option.
- Enter the proper noun of your selection.
- Click SAVE.
- Choose Quality of 8-ten
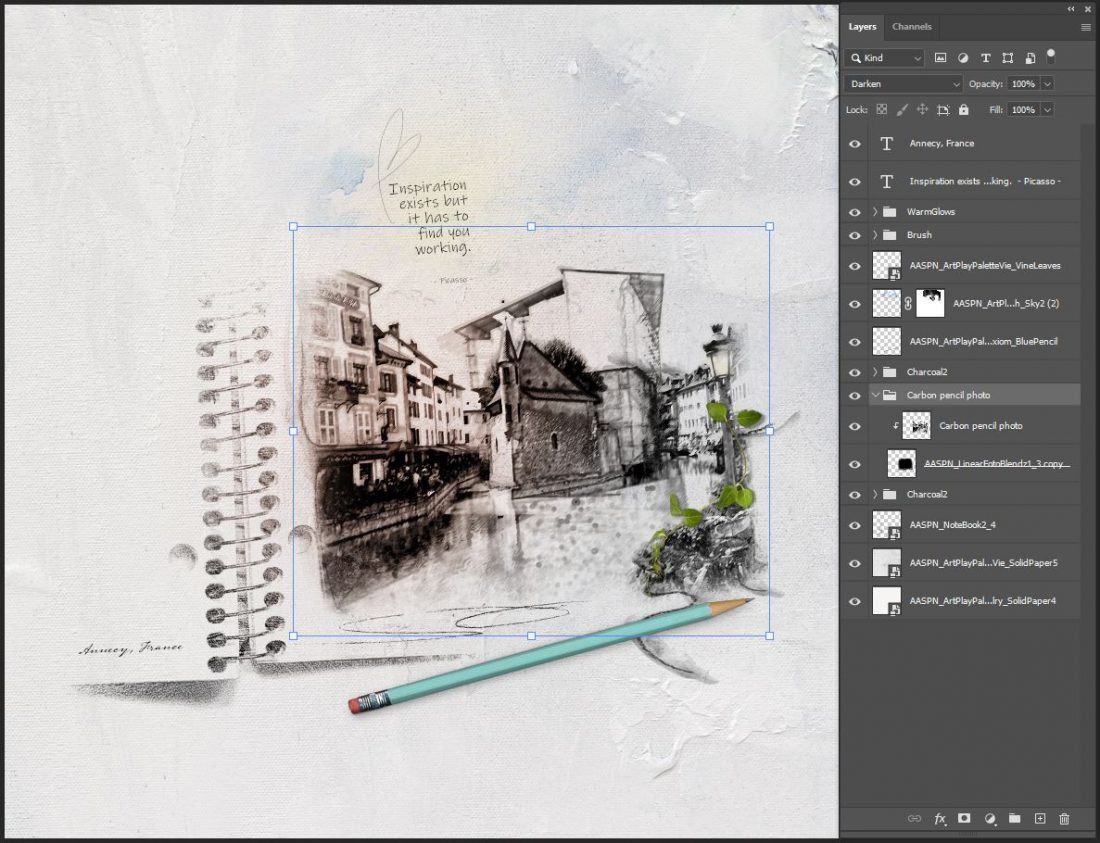
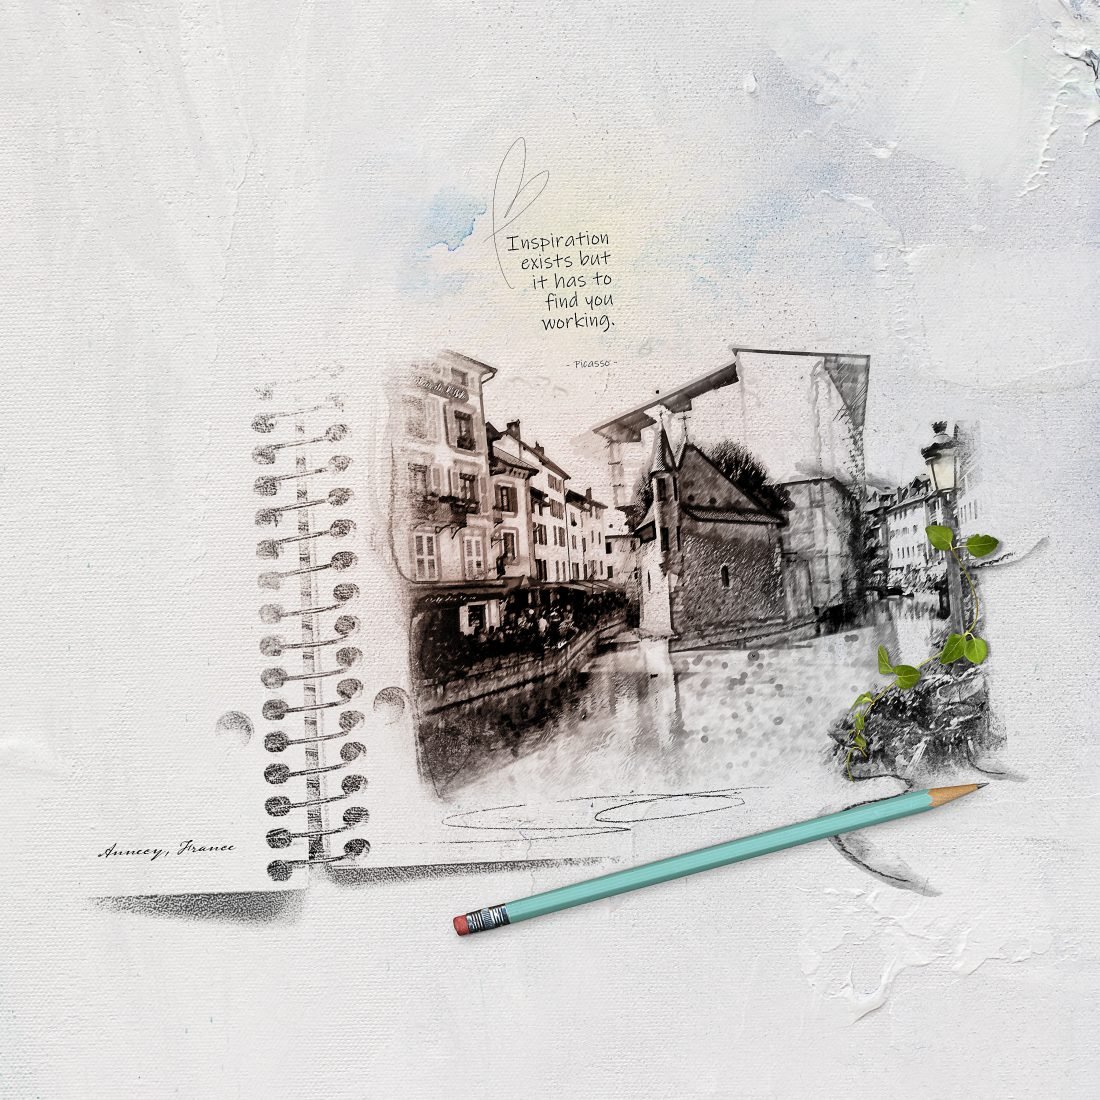
six. Create Artistry
Support your edited image with DigitalART supplies to create a photo artistry layout.
- Go to File> New and create a 12 X 12 inch New Layout at 300 DPI.
- Choose an Artsy Newspaper every bit a layout foundation or build your own using a Solid Paper and Transfers/Overlays.
- Open and move your saved .jpg file onto the layout using the Move Tool from the Tools Panel.
- Embellish with elements such as more BrushSets, MultiMedia and FotoGlows
Summary
Use Filters in Photoshop to transform your photos into fine art.
This can:
- Brand your photos part of the artistry.
- Inject mood into the design to better tell the visual story.
- Elevate your Photoshop skills.
DigitalART Supplies
A complete list of DigitalART supplies can be institute here.
Run across Prototype No_7

Source: https://annaaspnesdesigns.com/create-a-charcoal-pencil-photo-effect/
Posted by: dianatworesece.blogspot.com
0 Response to "How To Turn An Image Into A Charcoal Drawing In Photoshop"
Post a Comment