

What Is The Largest Canvas In Photoshop 7.0

Increasing Canvass Size with the Crop Tool in Photoshop
Think the Crop Tool is only for cropping images? Acquire how it can besides exist used to quickly add together more sail and a border around your photos!
So far in this series on cropping images in Photoshop, nosotros've seen several examples of how the Crop Tool is used to crop abroad unwanted areas of an image. But a lesser-known feature of the Crop Tool is that information technology can too be used to add more canvas infinite around an image, giving usa a quick and easy manner to add a decorative border around a photo! In this tutorial, nosotros'll learn how to add canvas space with the Crop Tool, and how to turn the extra space into a simple, customizable photo border!
If you lot're not notwithstanding familiar with using the Crop Tool in Photoshop, you may want to read through the first tutorial in this series, how to crop images, before you continue. I'll be using Photoshop CC here but this tutorial is fully compatible with CS6 and earlier.
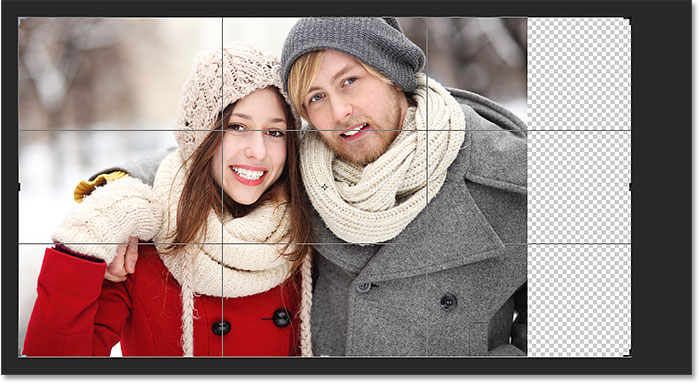
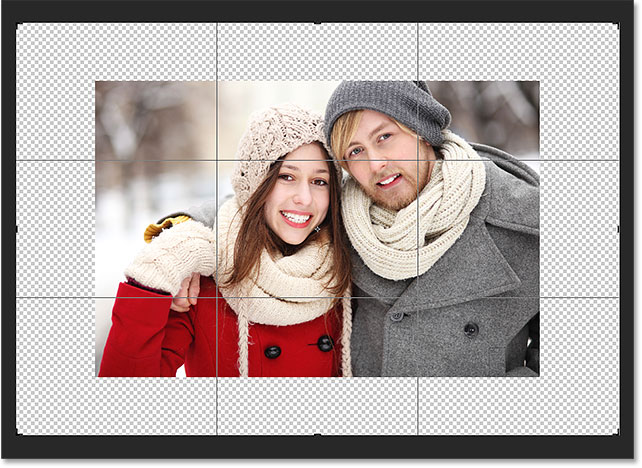
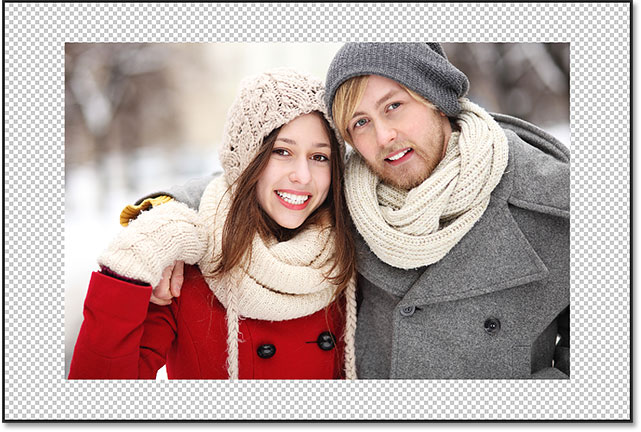
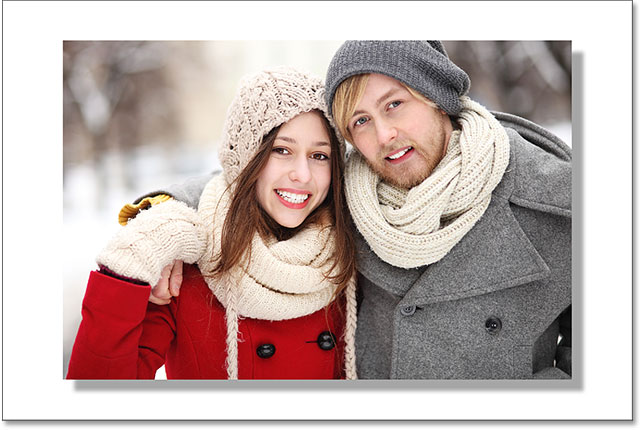
You tin use any image of your own to follow along. Here'south the photo I'll exist using which I downloaded from Adobe Stock:
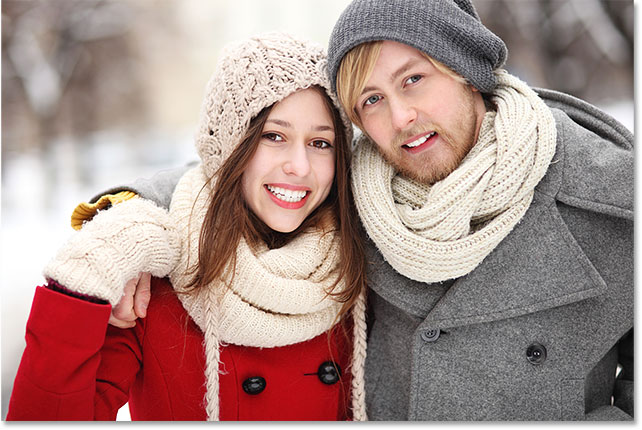
The original photograph. Image credit: Adobe Stock.
This is lesson 3 in my Cropping Images in Photoshop serial.
Allow's get started!
How to add more sheet with the Crop Tool
Step 1: Catechumen the Background layer into a normal layer
With our paradigm newly-opened in Photoshop, if nosotros look in the Layers panel, we find the image sitting on the Background layer, currently the just layer in our certificate:
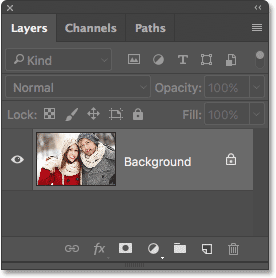
The Layers console showing the image on the Background layer.
Earlier we add more canvass space around the epitome, the first thing we should do is convert the Background layer into a normal layer. The reason is that we want the extra infinite to announced on its own separate layer below the image, simply Photoshop doesn't let united states of america to identify layers below a Groundwork layer. The piece of cake solution is to merely convert the Groundwork layer into a normal layer.
To exercise that, in Photoshop CC, all we need to practice is click on the modest lock icon to the correct of Background layer's name:
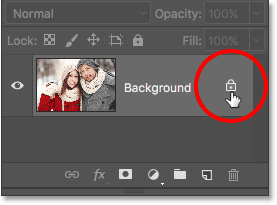
Clicking the Background layer'southward lock icon.
If y'all're using Photoshop CS6 or earlier (this too works in CC), press and hold the Alt (Win) / Selection (Mac) key on your keyboard and double-click on the proper name "Groundwork":
In CS6 and earlier, concur Alt (Win) / Option (Mac) and double-click on the layer's name.
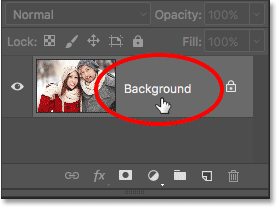
The Groundwork layer is instantly converted to a normal layer and renamed "Layer 0":
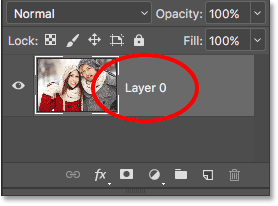
The Background layer is now a normal layer named "Layer 0".
Understanding Layers In Photoshop
Stride 2: Select the Crop Tool
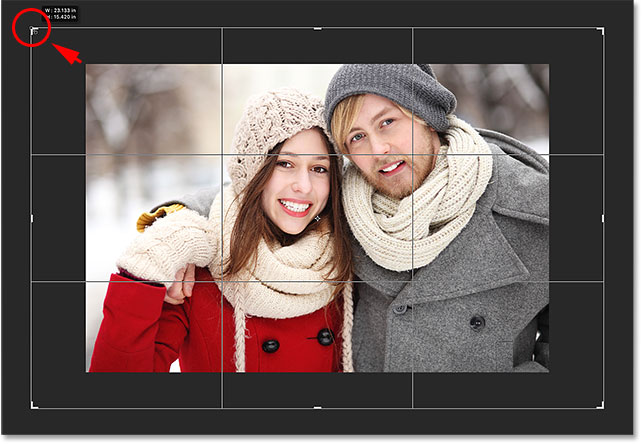
At present that we've solved that little problem, allow'southward learn how to add extra space effectually the image. Select the Crop Tool from the Toolbar along the left of the screen. You can also select the Crop Tool by pressing the letter C on your keyboard:
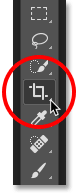
Selecting the Crop Tool.
With the Crop Tool selected, Photoshop places a default crop border effectually the epitome, along with handles on the superlative, bottom, left and right of the border, and i in each corner. We'll utilize these handles to resize the crop edge and add together our actress sheet infinite:
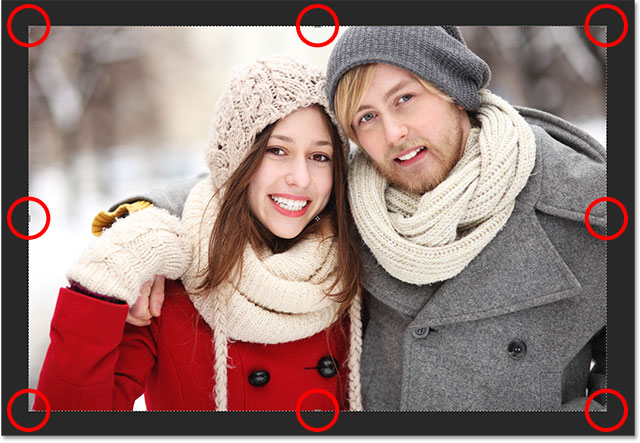
The crop handles (circled in reddish) effectually the prototype.
Step 3: Elevate the handles to resize the crop border
To add extra space around the paradigm, all nosotros need to exercise is click on the handles and drag them outward. Photoshop will then expand the size of the canvas to match the new size of the crop edge.
For instance, if I wanted to add space on the correct side of the photo, I would click on the right handle and drag information technology further to the correct, away from the image:
Dragging the right handle towards the correct.
When I release my mouse button, Photoshop adds the actress space and fills information technology with a checkerboard pattern. The checkerboard blueprint is how Photoshop represents transparency, which means that the extra space is currently empty. We'll prepare that in a few moments:
Photoshop adds actress, blank space on the right side of the image.
Rather than committing the ingather merely yet, let's look at how to add space around the rest of the image, along with a few of import keyboard shortcuts. I'll cancel my crop and reset my ingather border past pressing the Cancel push button in the Options Bar. You can besides cancel the crop by pressing the Esc fundamental on your keyboard:

Clicking the Abolish push button.
To add extra space on the left side of the photo, click on the left handle and drag information technology towards the left. Or, to add an equal corporeality of infinite on both sides of the image at the same time, press and hold your Alt (Win) / Option (Mac) key as you lot click and drag either the left or right handle. This will resize the ingather border from its eye, causing the handle on the opposite side to movement at the same time, in the opposite management:
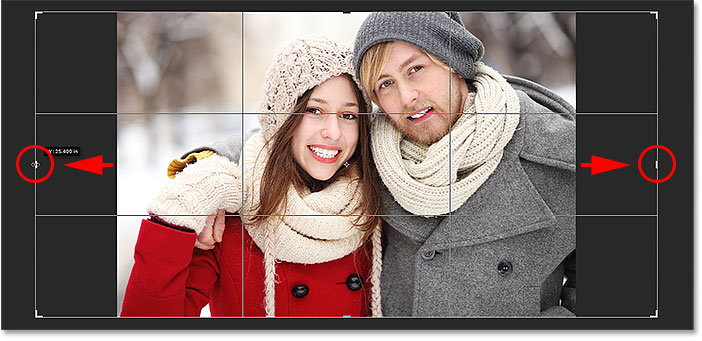
Calculation extra space to both sides by belongings Alt (Win) / Selection (Mac) as I drag.
I'll release my mouse button, then I'll release my Alt (Win) / Option (Mac) fundamental, and now we see an equal amount of bare space on both sides of the photograph. Make certain y'all release your mouse button first, then the Alt (Win) / Option (Mac) fundamental, or this play tricks won't work:
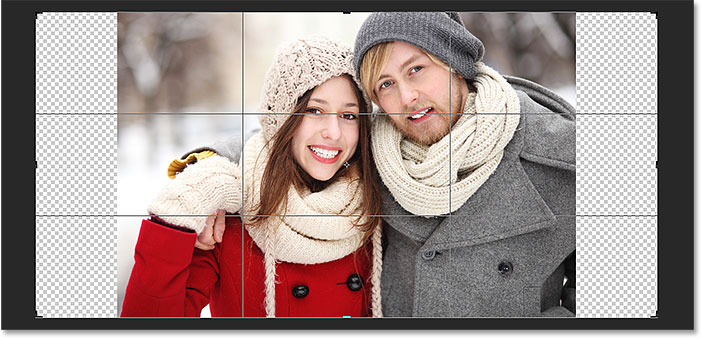
An equal corporeality of space has been added to both sides.
We can likewise add together actress space above and below the prototype. To add together space above it, click and drag the top handle upward. To add infinite below it, click and drag the bottom handle downward.
Or, to add an equal amount of space above and beneath the image at the aforementioned time, once again press and hold the Alt (Win) / Option (Mac) key on your keyboard as y'all drag either the top or lesser handle. The reverse handle will move along with it, in the opposite direction:
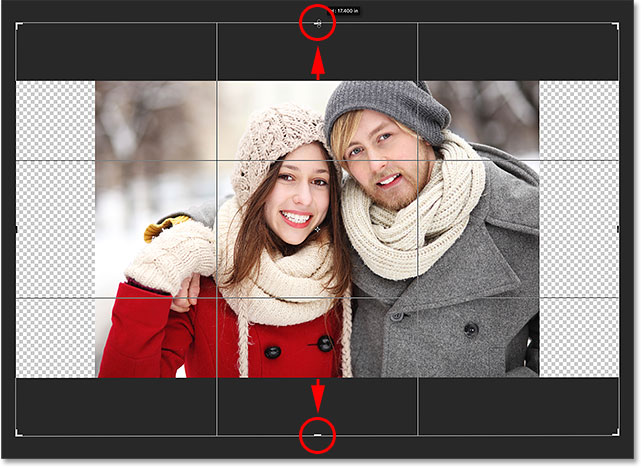
Adding extra infinite to the top and bottom by holding Alt (Win) / Option (Mac) as I drag either handle.
I'll release my mouse push button, then I'll release my Alt (Win) / Choice (Mac) central, and now I have an equal corporeality of bare space above and beneath the image. Once again, make sure y'all release your mouse button first, so the key, or it won't piece of work:
An equal corporeality of space has been added above and below the photo.
Let'south cancel the ingather one more than fourth dimension past pressing the Cancel button in the Options Bar, or by pressing the Esc key on your keyboard, so we can look at one more important keyboard shortcut:
Clicking the Cancel button.
Keeping the photograph's original attribute ratio
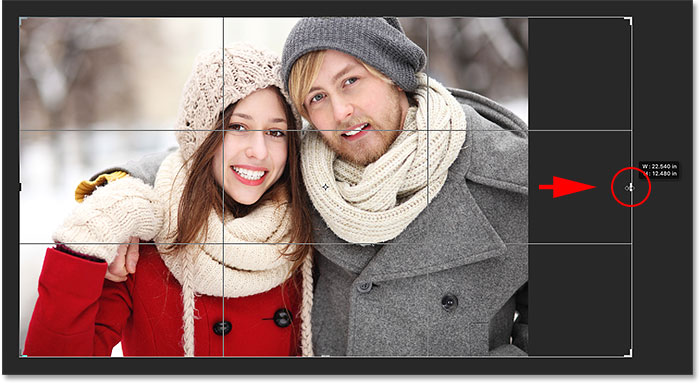
What if you want to keep the original attribute ratio of the epitome every bit you add extra canvas infinite around it? For example, you may have already cropped the image to, say, an eight ten 10, and now you want to maintain that viii 10 x ratio as you add the actress space.
To do that, press and agree Shift+Alt (Win) / Shift+Choice (Mac) as you elevate any of the corner handles outward. The Alt (Win) / Option (Mac) cardinal tells Photoshop to resize the crop border from its centre, while the Shift cardinal tells it to lock the original aspect ratio in place.
Here, I'one thousand belongings the keys as I drag the top left corner outward. Observe that all iv corners move outward together:
Adding extra space around the unabridged image at one time while keeping the original aspect ratio.
I'll release my mouse button, and then I'll release my Shift cardinal and my Alt (Win) / Choice (Mac) key (remembering to release the mouse push button before releasing the keys). Photoshop adds the actress blank space around the entire image, while the aspect ratio remains the same as it was originally:
The extra space has been added, still the aspect ratio remains the aforementioned.
Pace iv: Employ the crop
To employ the crop, click the checkmark in the Options Bar, or printing Enter (Win) / Return (Mac) on your keyboard:
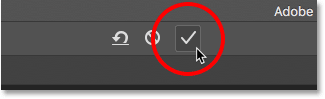
Clicking the checkmark to use the crop.
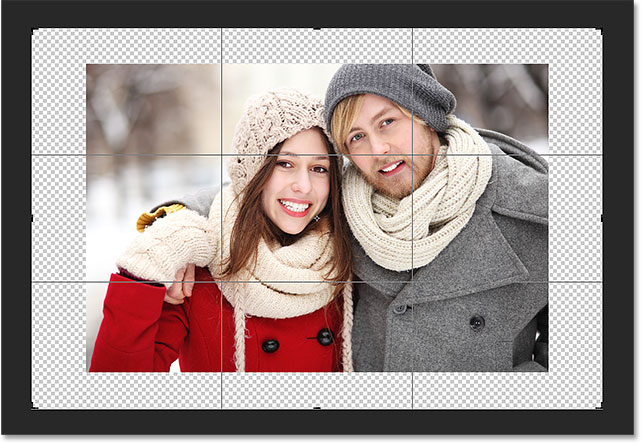
Photoshop "crops" the image, although in this instance, nosotros've actually done the opposite; we've added infinite with the Crop Tool rather than deleted it:
The outcome afterward applying the crop.
Footstep five: Add together a Solid Color fill layer
And then far, and so good. Nosotros've added the extra sheet space. Merely at the moment, the infinite is bare. Let'southward plough it into a photograph border by filling it with a color, and we'll practise that using one of Photoshop's Solid Color fill layers.
Click on the New Fill or Adjustment Layer icon at the bottom of the Layers panel:
Clicking the New Fill up or Adjustment Layer icon.
Then cull Solid Colour from the top of the list that appears:
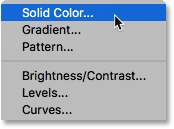
Choosing "Solid Color" from the list.
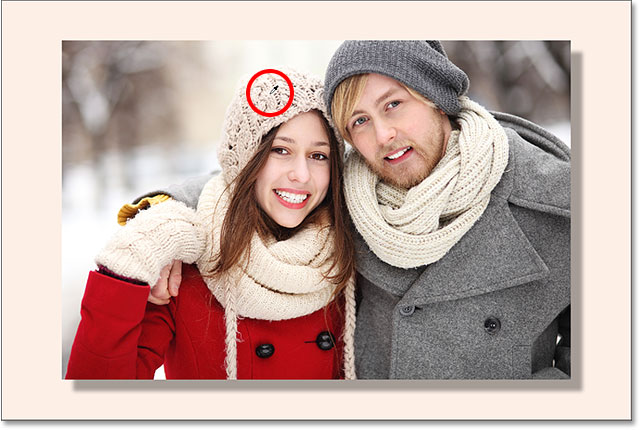
Photoshop will popular open the Color Picker where we can choose a color for the border. The default colour is black, merely choose white for now. At the end of the tutorial, nosotros'll learn how to customize the look of the edge by choosing a color direct from the paradigm:
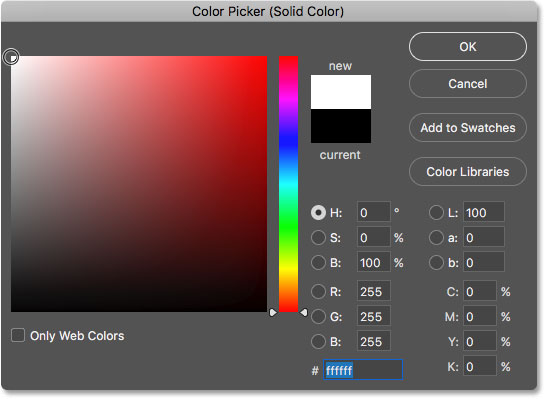
Choosing white for the color of the border.
Click OK to close out of the Color Picker. Photoshop temporarily fills the entire document with white, blocking the photograph from view. We'll gear up this problem adjacent:

The certificate is at present filled with white.
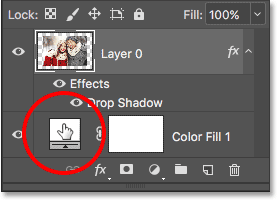
Step six: Elevate the fill layer below the mage
If we expect in the Layers console, we tin can see our Solid Colour fill layer, named "Color Fill 1". And, we see that the reason it'due south blocking our image from view is because it'south currently sitting above the prototype on "Layer 0". Any layers to a higher place other layers in the Layers panel appear in forepart of those layers in the document:
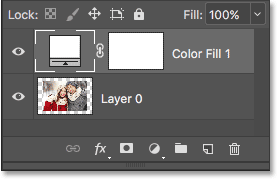
The Layers panel showing the fill layer above the paradigm.
Nosotros need to move the fill layer beneath the epitome in the Layers panel so that information technology appears behind the image in the certificate. To practice that, simply click on the make full layer and elevate it downwardly below "Layer 0". When y'all encounter a horizontal highlight bar appear below "Layer 0", release your mouse button:
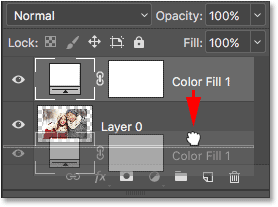
Dragging the Solid Color make full layer below "Layer 0".
Photoshop drops the fill up layer into place below the paradigm:
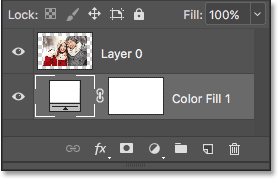
The Layers panel now showing the image above the fill layer.
And at present, the epitome appears in front of the white Solid Color fill layer in the document, creating our photo border consequence:
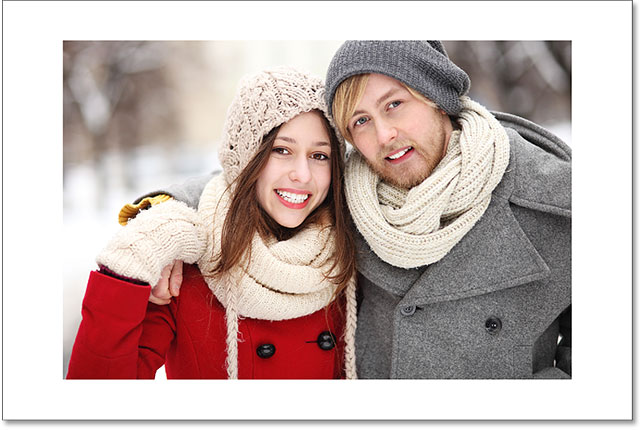
The epitome now appears with a white border effectually information technology.
Step vii: Select "Layer 0"
Now that we can run into our photo once more, permit's add a drib shadow to information technology. Get-go, click on the image layer (Layer 0) in the Layers panel to select information technology:

Selecting "Layer 0".
Footstep 8: Add a drop shadow
Then, click the Layer Styles icon (the "fx"icon) at the lesser of the Layers panel:
Clicking the Layer Styles icon.
Choose Drop Shadow from the list that appears:
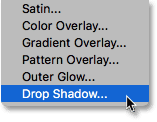
Choosing "Drop Shadow" from the list of layer styles.
This opens Photoshop's Layer Style dialog box set to the Driblet Shadow options in the middle column:
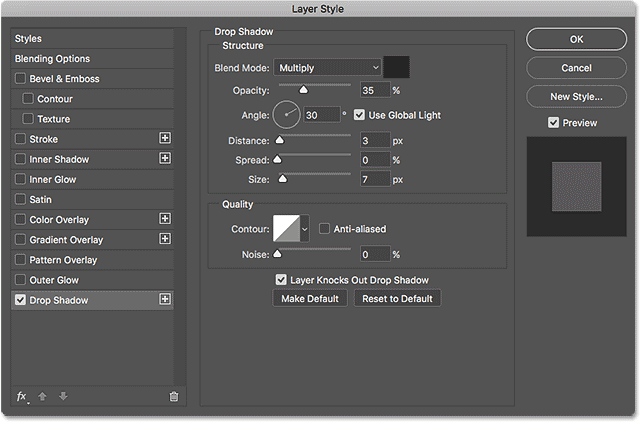
The Drop Shadow options in the Layer Manner dialog box.
The first thing nosotros usually want to practise when adding a drop shadow is set the angle and distance of the shadow. We could do this by adjusting the Angle and Distance values directly in the dialog box. But an easier fashion is to but click on the image in the document, keep your mouse push held down, and drag away from the image in the management yous want the shadow to fall. As you elevate, the shadow will move along with y'all.
Hither, I've dragged the shadow a short distance abroad from the prototype towards the lower correct of the document:
Setting the angle and distance of the shadow by clicking and dragging within the certificate.
As yous drag, you'll see the Bending and Distance values updating in the dialog box. The exact angle and distance values y'all choose may exist unlike from what I'k using here (the distance volition depend largely on the size of your image), but for me, an bending of around 135° and a distance of 180px looks adept:
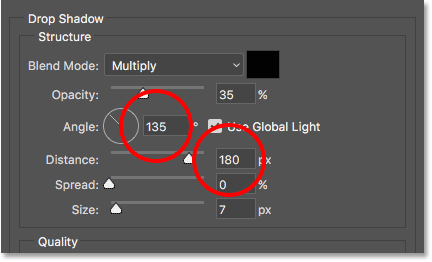
The Bending and Distance values.
Once you've ready the bending and distance, soften the edges of shadow past dragging the Size slider in the dialog box. The higher the value, the softer the shadow will appear. Like the Distance value, the Size value yous need will depend largely on the size of your image. For me, a value of around 50px works well.
You can likewise control how low-cal or nighttime the shadow appears past dragging the Opacity slider, merely I'll get out mine set to the default value of 35%:
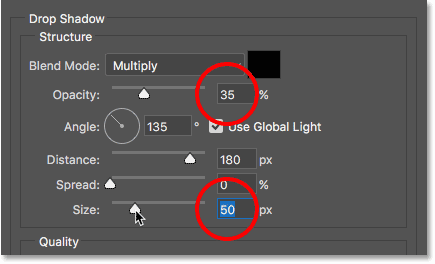
The Size and Opacity values.
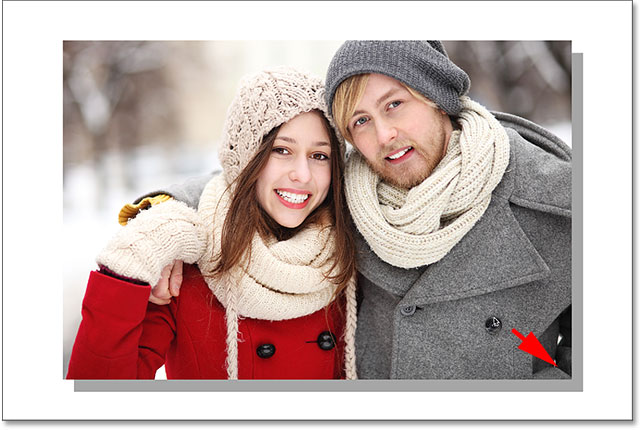
When you're happy with the results, click OK to shut out of the Layer Style dialog box. Here's my result with the drib shadow applied:
The effect after calculation the driblet shadow.
Irresolute the color of the border
Finally, even though nosotros've set the colour of the border to white, you can easily become dorsum and change it to whatever color you like. In fact, yous tin can even choose a color direct from the image itself.
To change the colour, double-click on the fill layer's color swatch in the Layers console:
Double-clicking on the colour swatch.
This re-opens Photoshop'southward Colour Picker:
The Color Picker re-opens.
If you lot know the exact color you need, yous can select it in the Colour Picker. Or, to choose a colour directly from the image, simply move your mouse cursor over the prototype. Your cursor will change into an eyedropper icon. Click on a color from the epitome to sample it and Photoshop will instantly prepare it as the new color for the border.
For example, I'll click on a spot in the human being's grey jacket (circled in yellow), and here, we see that the color of my border is now that aforementioned shade of gray:

Clicking on the homo'due south jacket changes the border to grey.
If you don't like the color, just click on a unlike color in the image to sample it and endeavor once again. I'll click on the woman's lid this time, and Photoshop instantly updates the border color to friction match. When you're happy with the results, click OK to close out of the Color Picker:
The color of the woman's hat ends up being a better pick for the border.
And there we accept information technology! That's how to hands add extra canvas infinite effectually an image using the Crop Tool, along with how to turn the actress space into a uncomplicated photo border effect, in Photoshop! In the adjacent lesson, I show you the essential Ingather Tool tips and tricks that make cropping images easier than ever!
You tin can jump to any of the other lessons in this Cropping Images in Photoshop serial. Or visit our Photoshop Nuts department for more topics!
Other Stuff
© 2022 Photoshop Essentials.com.
For inspiration, not duplication.
Site pattern past Steve Patterson.
Photoshop is a trademark of Adobe Systems Inc.
Source: https://www.photoshopessentials.com/basics/increasing-canvas-size-crop-tool-photoshop/
Posted by: dianatworesece.blogspot.com
0 Response to "What Is The Largest Canvas In Photoshop 7.0"
Post a Comment